


Cài LEMP → Cài WordPress Multisite → Cài SSL trên Ubuntu
BƯỚC 1: CÀI LEMP (Linux + Nginx + MariaDB + PHP)
1.1. Cập nhật hệ thống
sudo apt update && sudo apt upgrade -y
1.2. Cài Nginx
sudo apt install nginx -y
Khởi động và bật Nginx:
sudo systemctl start nginx
sudo systemctl enable nginx
1.3. Cài MariaDB
sudo apt install mariadb-server -y
sudo mysql_secure_installation
Tạo database cho WordPress:
sudo mysql -u root -p
CREATE DATABASE wp_db DEFAULT CHARACTER SET utf8mb4 COLLATE utf8mb4_unicode_ci;
CREATE USER ‘wp_user’@’localhost’ IDENTIFIED BY ‘your_strong_password’;
GRANT ALL PRIVILEGES ON wp_db.* TO ‘wp_user’@’localhost’;
FLUSH PRIVILEGES;
EXIT;
1.4. Cài PHP và extensions
sudo apt install php-fpm php-mysql php-curl php-gd php-mbstring php-xml php-xmlrpc php-soap php-intl php-zip unzip -y
Kiểm tra PHP version:
php -v
BƯỚC 2: CÀI WORDPRESS
2.1. Tải WordPress và giải nén
cd /var/www/
sudo wget https://wordpress.org/latest.tar.gz
sudo tar -xzvf latest.tar.gz
sudo chown -R www-data:www-data wordpress
sudo chmod -R 755 wordpress
sudo mv wordpress yourdomain.com # đổi tên thư mục theo domain thật của bạn
2.2. Cấu hình Nginx cho WordPress
Tạo file cấu hình mới:
sudo nano /etc/nginx/sites-available/yourdomain.com
Dán nội dung sau (chỉnh lại domain):
server {
listen 80;
server_name yourdomain.com www.yourdomain.com;
root /var/www/yourdomain.com;
index index.php index.html index.htm;
location / {
try_files $uri $uri/ /index.php?$args;
}
location ~ \.php$ {
include snippets/fastcgi-php.conf;
fastcgi_pass unix:/run/php/php8.1-fpm.sock; # đổi nếu PHP version khác
}
location ~ /\.ht {
deny all;
}
access_log /var/log/nginx/yourdomain.com.access.log;
error_log /var/log/nginx/yourdomain.com.error.log;
}
Kích hoạt config:
sudo ln -s /etc/nginx/sites-available/yourdomain.com /etc/nginx/sites-enabled/
sudo nginx -t
sudo systemctl reload nginx
2.3. Cấu hình wp-config.php
Tạo file wp-config.php:
cd /var/www/yourdomain.com
sudo cp wp-config-sample.php wp-config.php
sudo nano wp-config.php
Thêm thông tin DB:
define(‘DB_NAME’, ‘wp_db’);
define(‘DB_USER’, ‘wp_user’);
define(‘DB_PASSWORD’, ‘your_strong_password’);
define(‘DB_HOST’, ‘localhost’);
define(‘DB_CHARSET’, ‘utf8’);
define(‘DB_COLLATE’, ”);
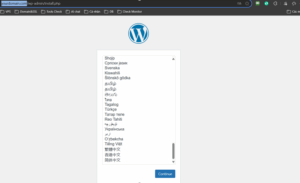
Đến đây thì có thể truy cập http://yourdomain.com/ để setup tiếp site admin WP rồi
BƯỚC 3: CÀI SSL (Let’s Encrypt)
3.1. Cài Certbot
sudo apt install certbot python3-certbot-nginx -y
3.2. Cấp SSL cho domain chính:
sudo certbot –nginx -d yourdomain.com -d www.yourdomain.com
Chọn redirect HTTP → HTTPS.
3.3. Cài SSL cho các subdomain (nếu dùng subdomain Multisite)
sudo certbot –nginx -d sub1.yourdomain.com -d sub2.yourdomain.com
Hoặc cấu hình Wildcard SSL (nếu bạn dùng DNS và hỗ trợ wildcard, ví dụ Cloudflare):
sudo certbot -d ‘*.yourdomain.com’ -d yourdomain.com –manual –preferred-challenges dns certonly
3.4. Kiểm tra và tự động gia hạn:
sudo certbot renew –dry-run